Database Backup and Recovery
The longer you use Clooz (or any of the programs supporting your family history research), the more valuable your work will become. Clooz has built-in functions to create backup copies of its database files and recover a database from backup copies for use again in Clooz. Creation of the backup copy is initiated by any of the following methods or events:
- A Clooz database file is closed (if set in program options),
- Clooz program is exited (if set in program options),
- Before a data import in the Data Transfer Manager (if check box on Data Transfer Manager is set to perform archive), or
- Manually using the Database Backup and Recovery tool on the Home tab page.
When Clooz performs a backup action, the file is compressed (zipped) to save disk save, and placed in the folder you have designated in the program Options. The only exception is with manual backup and recover, where a different folder location can be specified (see Manual Backup). The number of backup copies maintained (where oldest are replaced by most recent copies) and whether the file copies are tagged with the date in the filename are options you can set in the program options.
When you installed Clooz, the default location for storing archived copies of your database is the BackupRepository folder within your Clooz Data folder. This is not necessarily the best place for saving backup copies. Backup copies are best kept on a different physical disk, preferably on a different computer, and ideally in a different physical location all together (such as in the Cloud). You may already have a computer system-wide backup service that handles all of this. Just make sure the backup location you specify in Clooz is included in the locations backed up by that service. Otherwise, you might have a subscription to services such as Dropbox. If so, placing the backup folder location within the local area on your computer replicated by Dropbox in the cloud would provide a safe arrangement.
Clooz does not backup any of the digital media files you might have attached to your records in Clooz. Be sure your general backup plan for your computer system includes those as well as all the other files you've generated or collected as part of your family history research.
Database Backup Options
The program Options screen (Home tab page) includes a number of backup-related options in the Application Shutdown/Database Closing category.

You can have the database backup run automatically every time you close the database (to open a different one) and/or every time you exit Clooz. In both of those cases, you can set the automatic backup to None (no backup run), Ask (a prompt will be shown for you to chose), or Always (backup run every time).
Manual Database Backup
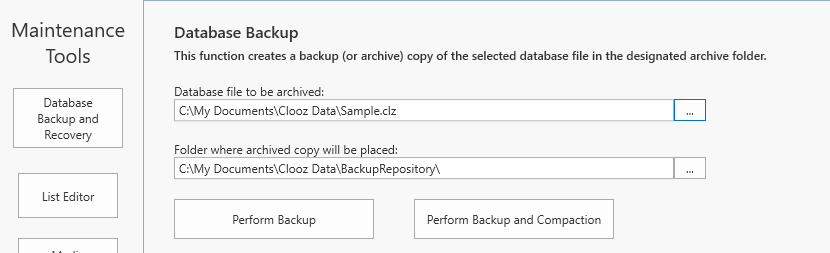 To make a backup copy of your database, go to the Home tab page, Tools screen, and click the Database Backup and Recovery button and follow these steps:
-
Select the database file to be archived. (Click the browser button at the right end of the edit box to select the file using a File selection dialog.)
-
Select the Folder where the archived copy will be placed. (Click the browser button at the right end of the edit box to select the folder using a Folder browser dialog.)
-
Click the Perform Backup button to execute the backup. (If the database has undergone many additions and deletions over a lengthy period of time, use the Perform Backup and Compaction button instead. Clooz will remove unused space in the database and have it setup for optimal performance.)
Database Recovery
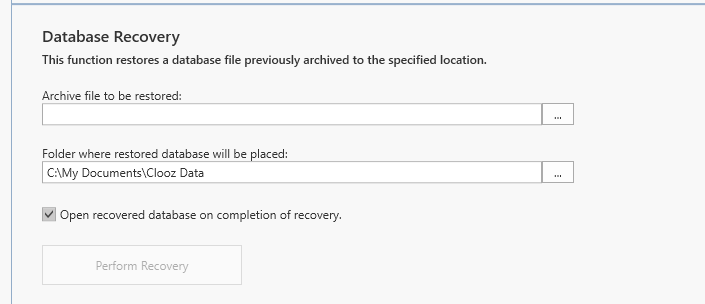 To recover a database from a backup copy, go to the Home tab page, Tools screen, and click the Database Backup and Recovery button and follow these steps:
-
Select the database file to be restored. (Click the browser button at the right end of the edit box to select the file using a File selection dialog.)
-
Select the Folder where the restored copy will be placed. This is typically the folder in which you keep your working copies of Clooz databases. (Click the browser button at the right end of the edit box to select the folder using a Folder browser dialog.)
-
Click the Perform Recovery button to execute the recovery. The recovered database will be opened in Clooz if the check box is checked controlling that.